OBIEE writeback option is a new feature that would allow end users to update or insert data back into the database.
For example, one can have a column of data that can be manually entered by end users, which in turn can be updated back to the database.
Following are the Steps:-
Repository Changes:-
1. Enter in the relevant details in the connection pool writeback properties section.
2. Each table not cacheable in the RPD physical layer.
3. Grant the privilege “Execute Direct Database Access” to the permitted group of user in Manage / Security in RPD.
4. In BMM level the aggregation rule is set to “None”
Presentation Services Changes:-
5. Log into OBI EE Answer and give in the writeback privilege.
6. Create a sample report and the column properties enable writeback.
7. Create XML Template and placed in {ORACLEBI}\web\msgdb\customMessages folder.
8. Go to the table properties of the report and click on the write back option. Enter in the template details.
9. Finally restart the Oracle BI service and enter in some data and test out the write back.
1. The first step is to enter in the relevant details in the connection pool writeback properties section. If you are on Oracle, leave them as default.


3. Grant the privilege “Execute Direct Database Access” to the permitted group of user in Manage / Security in RPD.


4. In BMM level the aggregation rule is set to “None”

5. Once this done, log into OBI EE Answer and give in the writeback privilege to those users who would need them. In my case, I would be giving them to Administrator since it is not enabled by default.

6. Next is to create a sample report that would include the T1 and T2 columns. I have a report with all the 5 dimension keys and tables and the column properties enable writeback.

7.After enabling the write back, save the report. The next step is to specify the query that we would like the BI Server to execute while writing back to the database. The queries (insert and update) are specified in a XML Template. The XML Templates are generally placed in {ORACLEBI}\web\msgdb\customMessages folder. The structure of my XML template file is
Insert and update Query

8. Go to the table properties of the report and click on the write back option. Enter in the template details.

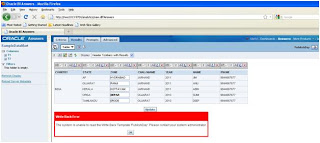
9. Enter in some data and test out the write back.


Write Back Limitations
Observe the following limitations for the write back feature:
* The write back abilities are for Table View only. Other views including chart, gauge, and pivot can be displayed but do not have edit fields for changing values.
* All values in write back columns are editable. When displayed in nonprinter friendly context, editable fields appear as if the user has Write Back privilege. However, when a logical column is mapped to a physical column that can change, the logical column returns values for multiple level intersections. This scenario can cause problems.
* Any field in a report can be flagged as a write back field, even if it is not derived from the write back table that you created. The responsibility for correctly tagging fields lies with the creator of the report.
* Write back reports do not support drill-down.
* The user interface does only minimal validation of data input. If the field is numeric and the user enters text data, then the user interface detects that and prevents the invalid data from going to the database. However, it does not detect other forms of invalid data input (values out of range, mixed text and numeric, and so on). When the user clicks the write back button and an insert or update is executed, invalid data results in an error message from the database. The user can then correct the faulty input. Report authors can include text in the write back report to aid the user, for example, "Entering mixed alphanumeric values into a numeric data field is not allowed."
* A template can contain SQL statements other than insert and update. The write back function passes these statements to the database. However, Oracle does not support or recommend the use of any statements other than insert or update.
* The write back feature is not suitable for entering arbitrary new records. In other words, do not use it as a data input tool.
* Numeric columns must contain numbers only. They should not contain any data formatting characters such as dollar signs ($), octothorpes (#), percent signs (%), and so on.
* Text columns should contain string data only.
No comments:
Post a Comment